How to Incorporate Electric Drums into Your Setup (Pt. 1/3): Using the Roland SPD::ONE.
Incorporating electric drums into your set up and knowing how to use them effectively is a must for the modern drummer. I’ve been running backing tracks, triggers and sample pads on my gigs for longer than I can remember now and I definitely wouldn’t have gotten these gigs if not for my knowledge of how to use them to enhance a live performance.
Electric drums offer endless possibilities for expanding your sound. In this series, we’re looking at how you can add electronic elements to your drumming setup. The Roland SPD::ONE is a great starting point for this, offering a simple and effective way to integrate electronic sounds into your acoustic kit. In this post, we’ll explore how you can make the most of the SPD::ONE and begin adding electronic layers to your performances.
Disclaimer: This is not an ad for Roland. You can use any sample pad you like. I just prefer to use Roland but the tips here are universal.
What is the Roland SPD::ONE?
The Roland SPD::ONE is a compact percussion pad designed to give drummers access to a wide range of electronic sounds. There are several versions available: SPD::ONE Electro, Kick, Percussion, and WAV. Each model is equipped with different pre-loaded sounds, but you can also import your own sounds on the WAV model, which offers even more creative flexibility.
The SPD::ONE is designed to be intuitive, with just a few knobs and buttons controlling the volume, sensitivity, and effects. It’s a user-friendly tool, perfect for both beginner drummers looking to experiment and experienced players wanting to expand their sonic palette.
Why Use the SPD::ONE?
Incorporating electric drums adds versatility to your performance. Here’s why the SPD::ONE is a great tool:
Compact and Portable: The SPD::ONE is small enough to fit into your setup without making major adjustments, which makes it ideal for live performances.
Pre-Loaded and Custom Sounds: Each version of the SPD::ONE comes with built-in sounds, like electronic snares and kicks on the Electro version, or more traditional percussion like congas and shakers on the Percussion version. If you have the SPD::ONE WAV, you can import your own samples, loops, or sounds to truly personalize your setup.
Ease of Use: Its simple interface lets you adjust settings like sensitivity and effects in real time, making it easy to adapt to the needs of each performance.
Creative Freedom: The flexibility to mix electronic sounds with your acoustic kit opens up new creative possibilities, allowing you to experiment with textures, genres, and unique sounds.
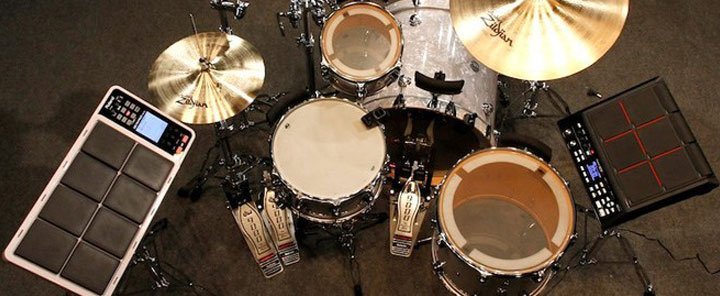
Step 1: Positioning the SPD::ONE in Your Setup
The first step in using the SPD::ONE is deciding where it fits in your setup. It can be mounted in a few different ways, depending on how you want to use it.
Mounted on a stand: The SPD::ONE can be attached to a stand or cymbal arm, giving you easy access during performances.
Tabletop: If you don’t need it as an integral part of your drum kit, you can keep it on a flat surface, which works well in more electronic-focused setups.
Floor: For the Kick version, placing the pad on the floor allows you to trigger it with your foot, making it a useful alternative to an acoustic kick drum.
Step 2: Exploring Built-In Sounds and Customizing
Once you have the SPD::ONE set up, it’s time to explore the sounds available. Each model comes pre-loaded with a variety of sounds that you can use right out of the box. Here’s how you can maximize its potential:
Explore Built-In Sounds: For example, the SPD::ONE Electro includes electronic sounds like snares, kicks, and hand claps, making it ideal for modern genres like pop or electronic music. The Percussion model has more organic sounds like tambourines and congas.
Import Your Own Sounds: If you’re using the SPD::ONE WAV model, you can load custom samples via USB. This is especially useful for adding specific loops, vocal snippets, or sound effects to your drumming.
Adjust Sensitivity and Effects: Each SPD::ONE has controls for adjusting sensitivity, allowing you to fine-tune how the pad responds to different playing styles. You can also tweak reverb, pitch, and other parameters to customize your sound further.
Spend time experimenting with the different sounds and settings to see how they complement your existing kit and music style.
Step 3: Integrating the SPD::ONE into Your Playing
Now that you’ve chosen your sounds and set up your pad, it’s time to integrate the SPD::ONE into your playing. Here are a few creative ways to do so:
Layering with Acoustic Sounds: You can layer electronic sounds with your acoustic kit to enhance your grooves. For instance, layering an electronic snare with your acoustic snare adds a modern edge to your sound, giving it more punch and texture.
Filling Out Your Sound: Use the SPD::ONE to add percussion that you don’t have space for in your acoustic setup. For example, adding tambourine or shaker sounds on a bridge or chorus can fill out your band’s overall sound without needing extra instruments. Make sure you can hear it otherwise, you might go out of time!
Accent Hits and Effects: Use the pad to trigger specific sounds for accents or effects in your songs. This works especially well with the WAV model, where you can load samples like vocal effects, reverse cymbals, or other one-shot sounds.
Step 4: Practice for Live Performances
Using the SPD::ONE live can bring a new level of excitement to your performances, but it requires practice. Here are some tips to help you make the transition from practice to the stage:
Timing: If you’re using the pad to add samples or percussion elements, make sure your timing is precise. Practice hitting the pad at the right moments to keep your grooves tight and aligned with the rest of the band.
Volume Control: Balance the volume of the SPD::ONE with the rest of your kit. Since it’s an electronic instrument, it can easily overpower or get lost in the mix if not carefully balanced. Adjust the volume knob on the pad as needed, and make sure it fits naturally into the overall sound.
Experimenting with Placement: If you find that hitting the pad is awkward in your current setup, experiment with moving it to a different spot. Adjust its placement until you’re comfortable accessing it quickly during performances.
By using the Roland SPD::ONE, you can easily incorporate electronic sounds into your acoustic setup. It offers a simple, flexible way to explore new sounds and textures, helping you grow as a musician. Whether you're layering sounds with your acoustic kit or adding unique samples, the SPD::ONE opens up creative possibilities.
Let’s move on to part 2, where we'll explore the Roland SPD-SX and how to run more complex setups with a wider range of samples!
Elevate Your Drumming Skills with Expert Instruction
Unlock your full potential as a drummer with personalized, professional drum lessons designed to suit your unique needs and goals. Whether you're a beginner looking to build a solid foundation or an experienced drummer aiming to refine your technique, tailored instruction can help you achieve excellence.
Contact me today to start your journey and take the first step toward mastering the art of drumming.
And don’t forget—I post daily blogs with tips, tricks, and guides like this one, so be sure to check back regularly for more drumming advice!
Until tomorrow,